How to Take Great Travel Photos with Just Your Phone
We’ve taken our phones across 25 countries — from Lapland midnight sun to Singapore’s neon streets. Here’s exactly what we’ve learned about getting travel photos with phone that you’ll actually want to look at again.
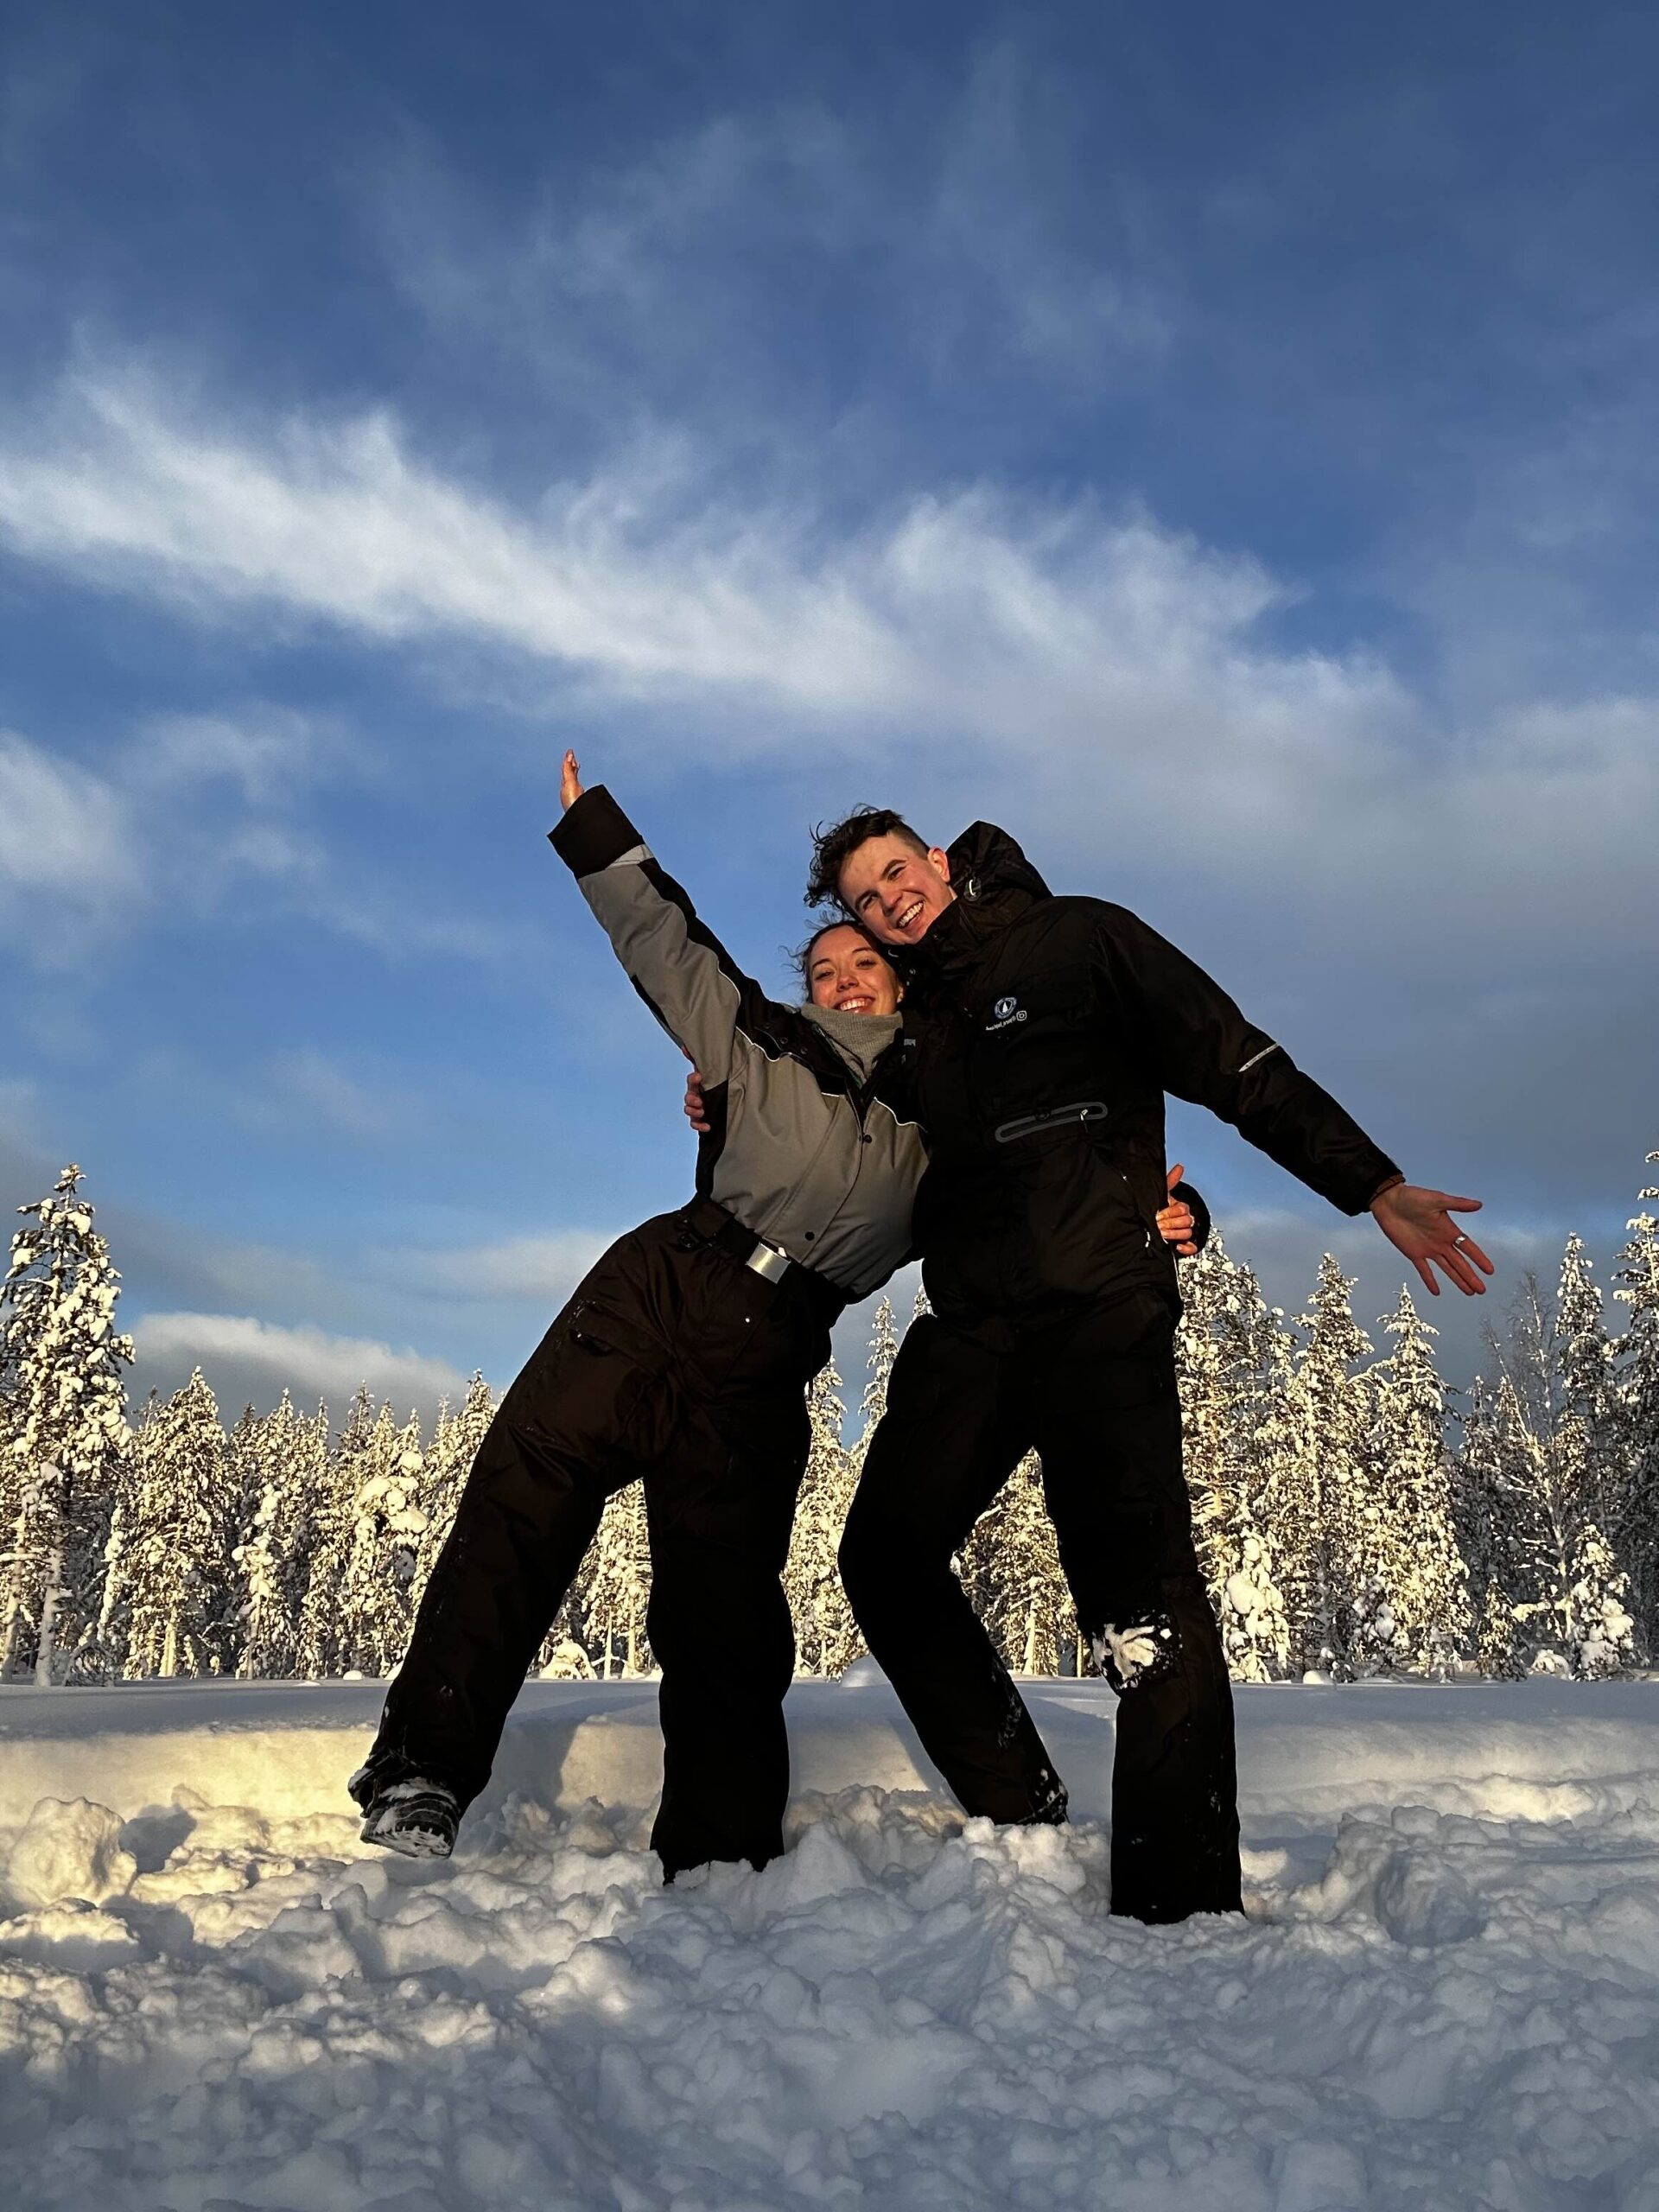
We are not photographers. We don’t carry a mirrorless camera, a bag full of lenses, or a tripod that weighs more than our hand luggage. What we carry is a phone — the same one we use to navigate Reykjavik, book ferries in the Faroe Islands, and look up train times at 6 am in Riga. And somehow, that phone has produced the images we’re most proud of from 25 countries of travel.
The honest truth about travel photos with phone is this: the gap between phone photography and “real” photography has collapsed. What hasn’t collapsed is the gap between people who understand light, composition, and timing — and people who don’t. That gap is entirely learnable, and this guide is how we’ve closed it ourselves.
Great travel photos with your phone come down to three things: chasing good light (golden hour and overcast skies beat midday sun every time), getting closer than feels comfortable, and turning off your phone’s over-aggressive processing by shooting in ProRAW or a flat picture style. Everything else is refinement.
Why your phone is already enough for great travel photos
The camera-gear myth
When we started travelling seriously — weekend trips from Rovaniemi to Norwegian fjords, then longer loops through Germany, France, Greece, and eventually Singapore — we assumed we needed better gear. We bought a compact camera. Then we stopped bringing it. The phone was always in our pocket and the compact was always in the bag.
Modern flagship phones shoot 50–200 megapixel images with computational HDR, optical image stabilisation, and AI-powered night mode. That’s more processing power than the professional studio cameras of fifteen years ago. The constraint is almost never the hardware.
What actually limits phone travel photos
- Light: shooting in harsh midday sun creates unflattering shadows and blows out highlights — no camera fixes this.
- Composition: a boring framing looks boring on any device.
- Patience: waiting for a cloud to pass, a person to move, or a wave to peak takes zero equipment.
- Post-processing: a five-minute edit in Lightroom Mobile transforms a flat phone JPEG into something printable.
Understanding light — the single biggest upgrade you can make
The two hours that change everything
The golden hour — the 45–60 minutes after sunrise and before sunset — does more for your travel photos than any camera upgrade ever will. The light is warm, directional, and soft. Shadows are long and interesting. Skin tones glow. Even a mediocre composition looks good.
In Lapland, summer golden hour lasts for hours — the midnight sun barely dips below a warm angle. In Norway we’ve photographed fjords at 11 pm in conditions that would cost a commercial photographer thousands in studio lighting to recreate. In Portugal we stayed up for sunset over the Atlantic cliffs at Cabo da Roca and shot images we still use as our desktop wallpapers.
What to do when the light is bad
Overcast days are underrated. A cloud layer acts as a giant softbox — it eliminates harsh shadows, creates even skin tones, and makes colours more saturated. The Faroe Islands are almost always overcast, and the greens of Saksun against that flat grey sky are some of the most dramatic images we’ve ever taken. Embrace it.
Midday direct sun is genuinely difficult. Move your subject into open shade, wait for a cloud, or reframe so the sun is behind your subject (backlight) and expose for the face manually.
Eight composition rules we actually use on every trip
Turn on your phone’s grid overlay (Settings > Camera > Grid). Place your horizon on the top or bottom third line, never dead centre. Place your subject at one of the four intersection points. This alone makes 80% of travel photos look more intentional.
The most common mistake in travel photography is standing too far back. Walk closer until it feels wrong, then take one more step. Details — a weathered door handle in Lisbon, a fisherman’s rope in the Faroe Islands, a market stall in Singapore — tell stories that wide establishing shots miss entirely.
Roads, canals, fences, shorelines, and corridors naturally draw the eye into the frame. In Amsterdam we lined up our shot along a canal reflection. In Budapest the Chain Bridge cables did the work for us. Look for lines before you look for subjects.
Doorways, arches, windows, and tree branches create natural frames that add depth and draw focus to your subject. We found extraordinary frames in Greek monastery doorways, in the Colosseum’s arched corridors, and simply looking through the open door of a Helsinki saunaboat.
Shooting from standing height is the default — and it looks like every other tourist photo. Crouch to street level for city shots. Lie flat for reflections on a wet cobblestone street after rain. The unusual angle signals effort, and the viewer senses it.
A fjord looks enormous. A fjord with a tiny boat in the foreground looks catastrophically enormous. A person, a car, a boat, a tent — scale references make landscapes feel real rather than like screensavers.
Puddles after rain, still lakes, marble floors, shop windows, sunglasses. Reflections double your image and create instant symmetry. In Rovaniemi the frozen lake reflections in early winter — when the ice is clear and a snow layer hasn’t arrived yet — are completely unreal to photograph.
An empty sky, a bare wall, a calm sea surface — these give the eye somewhere to rest and make your subject feel intentional rather than lost in clutter. Some of our favourite travel photos from Iceland are simply a person standing in fog. Nothing else.
Related guidePhone photography in extreme light conditions? Read our guide: Phone Photography for Midnight Sun: Settings That Actually Work
Phone camera settings that make a real difference
Most people never open their camera settings after the initial phone setup. These are the changes worth making before your next trip.
- Turn on the grid overlay: forces you to think about composition every time. Available in Settings > Camera on iPhone; Camera > Settings > Grid on most Android.
- Shoot ProRAW or RAW if available: gives you dramatically more latitude to recover highlights and shadows in editing. The files are bigger but the difference in post-processing flexibility is enormous.
- Disable Smart HDR over-processing: on iPhone, Smart HDR can produce an unnaturally tonemapped look. Try turning it off for landscapes and shooting ProRAW instead.
- Lock focus and exposure separately: on iPhone, tap and hold until the AE/AF lock appears. On Android, many apps let you separate the focus and exposure points. This stops the camera from re-exposing when something moves through frame.
- Use 1x or 2x optical zoom only: digital zoom degrades quality rapidly. Zoom with your feet whenever possible, or choose a shot that works at your lens’s native focal length.
- Shoot in burst for action: hold the shutter for bursts at beaches, markets, or sports. Pick the sharpest frame afterwards.
- Use Night Mode carefully: it’s extraordinary in very low light, but avoid it in moderate low light where it can over-soften moving subjects. Manual 1–3 second exposures on a tripod often look better.
- Lower your exposure slightly: most phone cameras slightly over-expose to produce bright, cheerful images. Slide the exposure down by -0.3 to -0.7 EV. You can lift shadows in editing, but blown highlights are gone forever.
Travel tips from the Arctic, monthly
No algorithm, no ads. Just our honest notes on where we’ve been and what actually worked.
What to do in tricky shooting conditions
- Crowds and tourists in frame: shoot early morning (before 8 am at popular sites), use a slow shutter and tripod to blur moving people, or embrace them — a busy market is supposed to look busy.
- Overcast grey sky: exclude most sky from frame. Shoot from low angles where the sky is a small part of the composition. Reframe to use reflections on wet surfaces instead of looking up.
- Backlit subjects (sunset portraits): tap your subject’s face to expose for them, or use Portrait mode which applies a tone curve that handles backlight reasonably well. Alternatively, silhouette them intentionally against the golden sky.
- Moving water (waterfalls, waves): for a silky blur, you need a long exposure — use a dedicated app like Slow Shutter Cam, brace your phone on a rock, and experiment with 1–4 second exposures. For frozen spray, burst mode in bright light works fine.
- Night scenes and city lights: Night Mode is remarkable. But for the sharpest results, rest your phone on a surface rather than handholding. The camera will extend exposure automatically to 5–10 seconds if it senses stability.
- Extreme cold (Lapland in winter): phone batteries drain alarmingly fast below -15°C. Keep the phone inside your jacket, take it out to shoot quickly, and return it to warmth. Have a power bank in an inner pocket.
What we use to edit travel photos on our phones
Editing is where good phone images become great ones. The goal is not to make the photo look fake — it’s to restore what your eye actually saw that the camera slightly misread.
- Lightroom Mobile (free version): our default. Adjust exposure, highlights, shadows, whites, blacks, and colour temperature. The profile panel lets you apply film-like looks. Sync presets across devices.
- Snapseed (free): particularly good for selective adjustments — you can brush exposure changes onto specific parts of an image rather than the whole frame. The Healing tool removes distracting elements cleanly.
- VSCO: excellent film presets. We use A4 and A6 for a muted, travel-editorial look. The free tier has enough to work with.
- Apple Photos editing (built-in): underrated. The “Vibrance” slider is gentler than Saturation. The “Brilliance” slider often does more with one tap than five manual adjustments.
Our standard edit takes under 3 minutes: exposure -0.3, highlights -40, shadows +30, whites -10, blacks -20, dehaze +10, temperature +200K warmer. That’s it. Consistent, not dramatic.
Planning your route? See how we use AI to plan trips more efficiently: How to Use ChatGPT for Travel Planning
The travel photo mistakes we made so you don’t have to
- Shooting everything at 10x zoom. Digital zoom on most phones is essentially a crop of a lower-resolution image. We’ve deleted dozens of blurry “zoomed in” shots from Norway, Greece, and Singapore. Use optical zoom or move closer.
- Never cleaning the lens. A fingerprint on the lens creates a soft haze across the entire image. We now wipe our lenses on a shirt before every serious shoot. It sounds obvious. We ignored it for years.
- Over-saturating in editing. The temptation to push saturation or vibrance until the image looks like a travel poster is real. We’ve done it. Now we edit on full brightness and check our edits on reduced brightness — if it still looks good in both conditions, we’ve found the balance.
- Not backing up in real time. We lost two weeks of Iceland photos to a dropped phone on our first ring road trip. Now we use Google Photos auto-sync on WiFi each evening. Non-negotiable.
- Shooting only the “famous” angle. Everyone has the same Eiffel Tower shot from Trocadéro. Walk 200 metres in any direction and you’ll find a frame nobody else is standing in. We’ve found our best city shots by simply walking past the obvious viewpoint.
- Ignoring the people. Landscapes without people are timeless but impersonal. We resisted putting ourselves in photos for years. Now the shots of us actually being somewhere — windswept on a Faroe Islands cliff, sitting in a Copenhagen harbour cafe — are the ones we reach for first.
Frequently asked questions
Do I need a recent flagship phone to take good travel photos?
Not necessarily. A 3–4 year old flagship (iPhone 12, Pixel 5, Samsung S21) is still excellent for travel photography. The jump in quality between generations is now quite small. The jump between understanding light and composition vs. not is still enormous — and that’s free.
Should I use Portrait mode for travel photos?
Portrait mode is excellent for close-up people shots and detail photos where you want background blur. We avoid it for wide landscape shots where the AI-generated bokeh around complex edges (trees, hair, railings) looks artificial. Use it selectively, not automatically.
What’s the best time of day to take travel photos?
Golden hour — the hour after sunrise and before sunset. The light is warm, directional, and forgiving. If you’re at a popular site, golden hour also often means fewer crowds. Early morning golden hour is especially underused: most tourists haven’t arrived yet.
How do I photograph in very low light without blur?
Use Night Mode, rest your phone on a stable surface (a wall, a table, a tripod), and use the timer so your tap doesn’t introduce shake. If you’re handholding, Night Mode will automatically limit exposure to reduce blur, but quality drops. A small $20 gorilla-pod tripod is one of the best investments we’ve made.
Is it worth editing phone photos or should I just post them straight?
Editing makes a significant difference, and it takes less time than you think. A 2–3 minute Lightroom Mobile edit — adjusting exposure, highlights, shadows, and temperature — transforms a phone JPEG from “fine” to “frame-worthy”. We edit every photo we post. Straight-from-phone shots usually look flat by comparison.
What should I do if my travel photos look blurry?
First check: are you using digital zoom? Step closer instead. Second: is there enough light? In dim conditions, the shutter slows to compensate and any movement blurs. Third: did you tap to lock focus? On both iPhone and Android, tap the subject to ensure the camera is focusing on what you intend, not the background.
A final word from Rovaniemi
We live in a place that visitors come to photograph from all over the world — the aurora, the midnight sun, the endless forest, the reindeer on the road at dusk. We watch people arrive with extraordinary camera setups and leave disappointed that their images don’t match what their eyes saw. And we watch other people pull out a phone, wait for the right moment, and capture something genuine.
The difference is almost never the equipment. It’s curiosity — looking for a frame instead of just pointing at a thing. It’s patience — waiting for the light to change rather than shooting the first available angle. And it’s honesty — not trying to make your trip look like a magazine spread, but capturing the actual feeling of being somewhere unfamiliar and wonderful.
Take your phone on your next trip. Learn one new thing from this guide and apply it. Your photos will be better. And more importantly, they’ll look like your trip — not a copy of every other travel photo you’ve seen.
Happy shooting,
Joona & Alla
Rovaniemi, Finland
Joona & Alla
A Finnish-Ukrainian couple living in Rovaniemi, Finland. Joona is a marketing professional in Lapland tourism; Alla is an AI Engineer. Together we’ve visited 25 countries and share honest, locally-grounded travel writing from our home in the Arctic.
Read our full story →